Supplies:
Glass bulbs (I bought mine at ACMoore for $4.00 for 6)
Crayons, Luckily I have a 3 year old and a 2 year old so broken crayons are in abundance. However, after experimenting with different brands, I do have to say that Crayolas melt the best.
Hair dryer
Craft knife or peeler, if you use the peeler make sure it’s one you are going to keep for just crafts since it will no longer be good for food
That’s it… nothing complex! First, you have to get the pesky paper off your crayons. The hardest part was peeling the labels off the crayons, However if you soak them for a few minutes it becomes easier.
For the next step we used 2 different methods. The first method was to break / cut the crayons into chunks, the second was to shave off pieces of the crayons. Each one gave a different result once melted. 
Next, remove the metal top of the ornament, pick your colors and place the chunks / shavings inside the ornament.
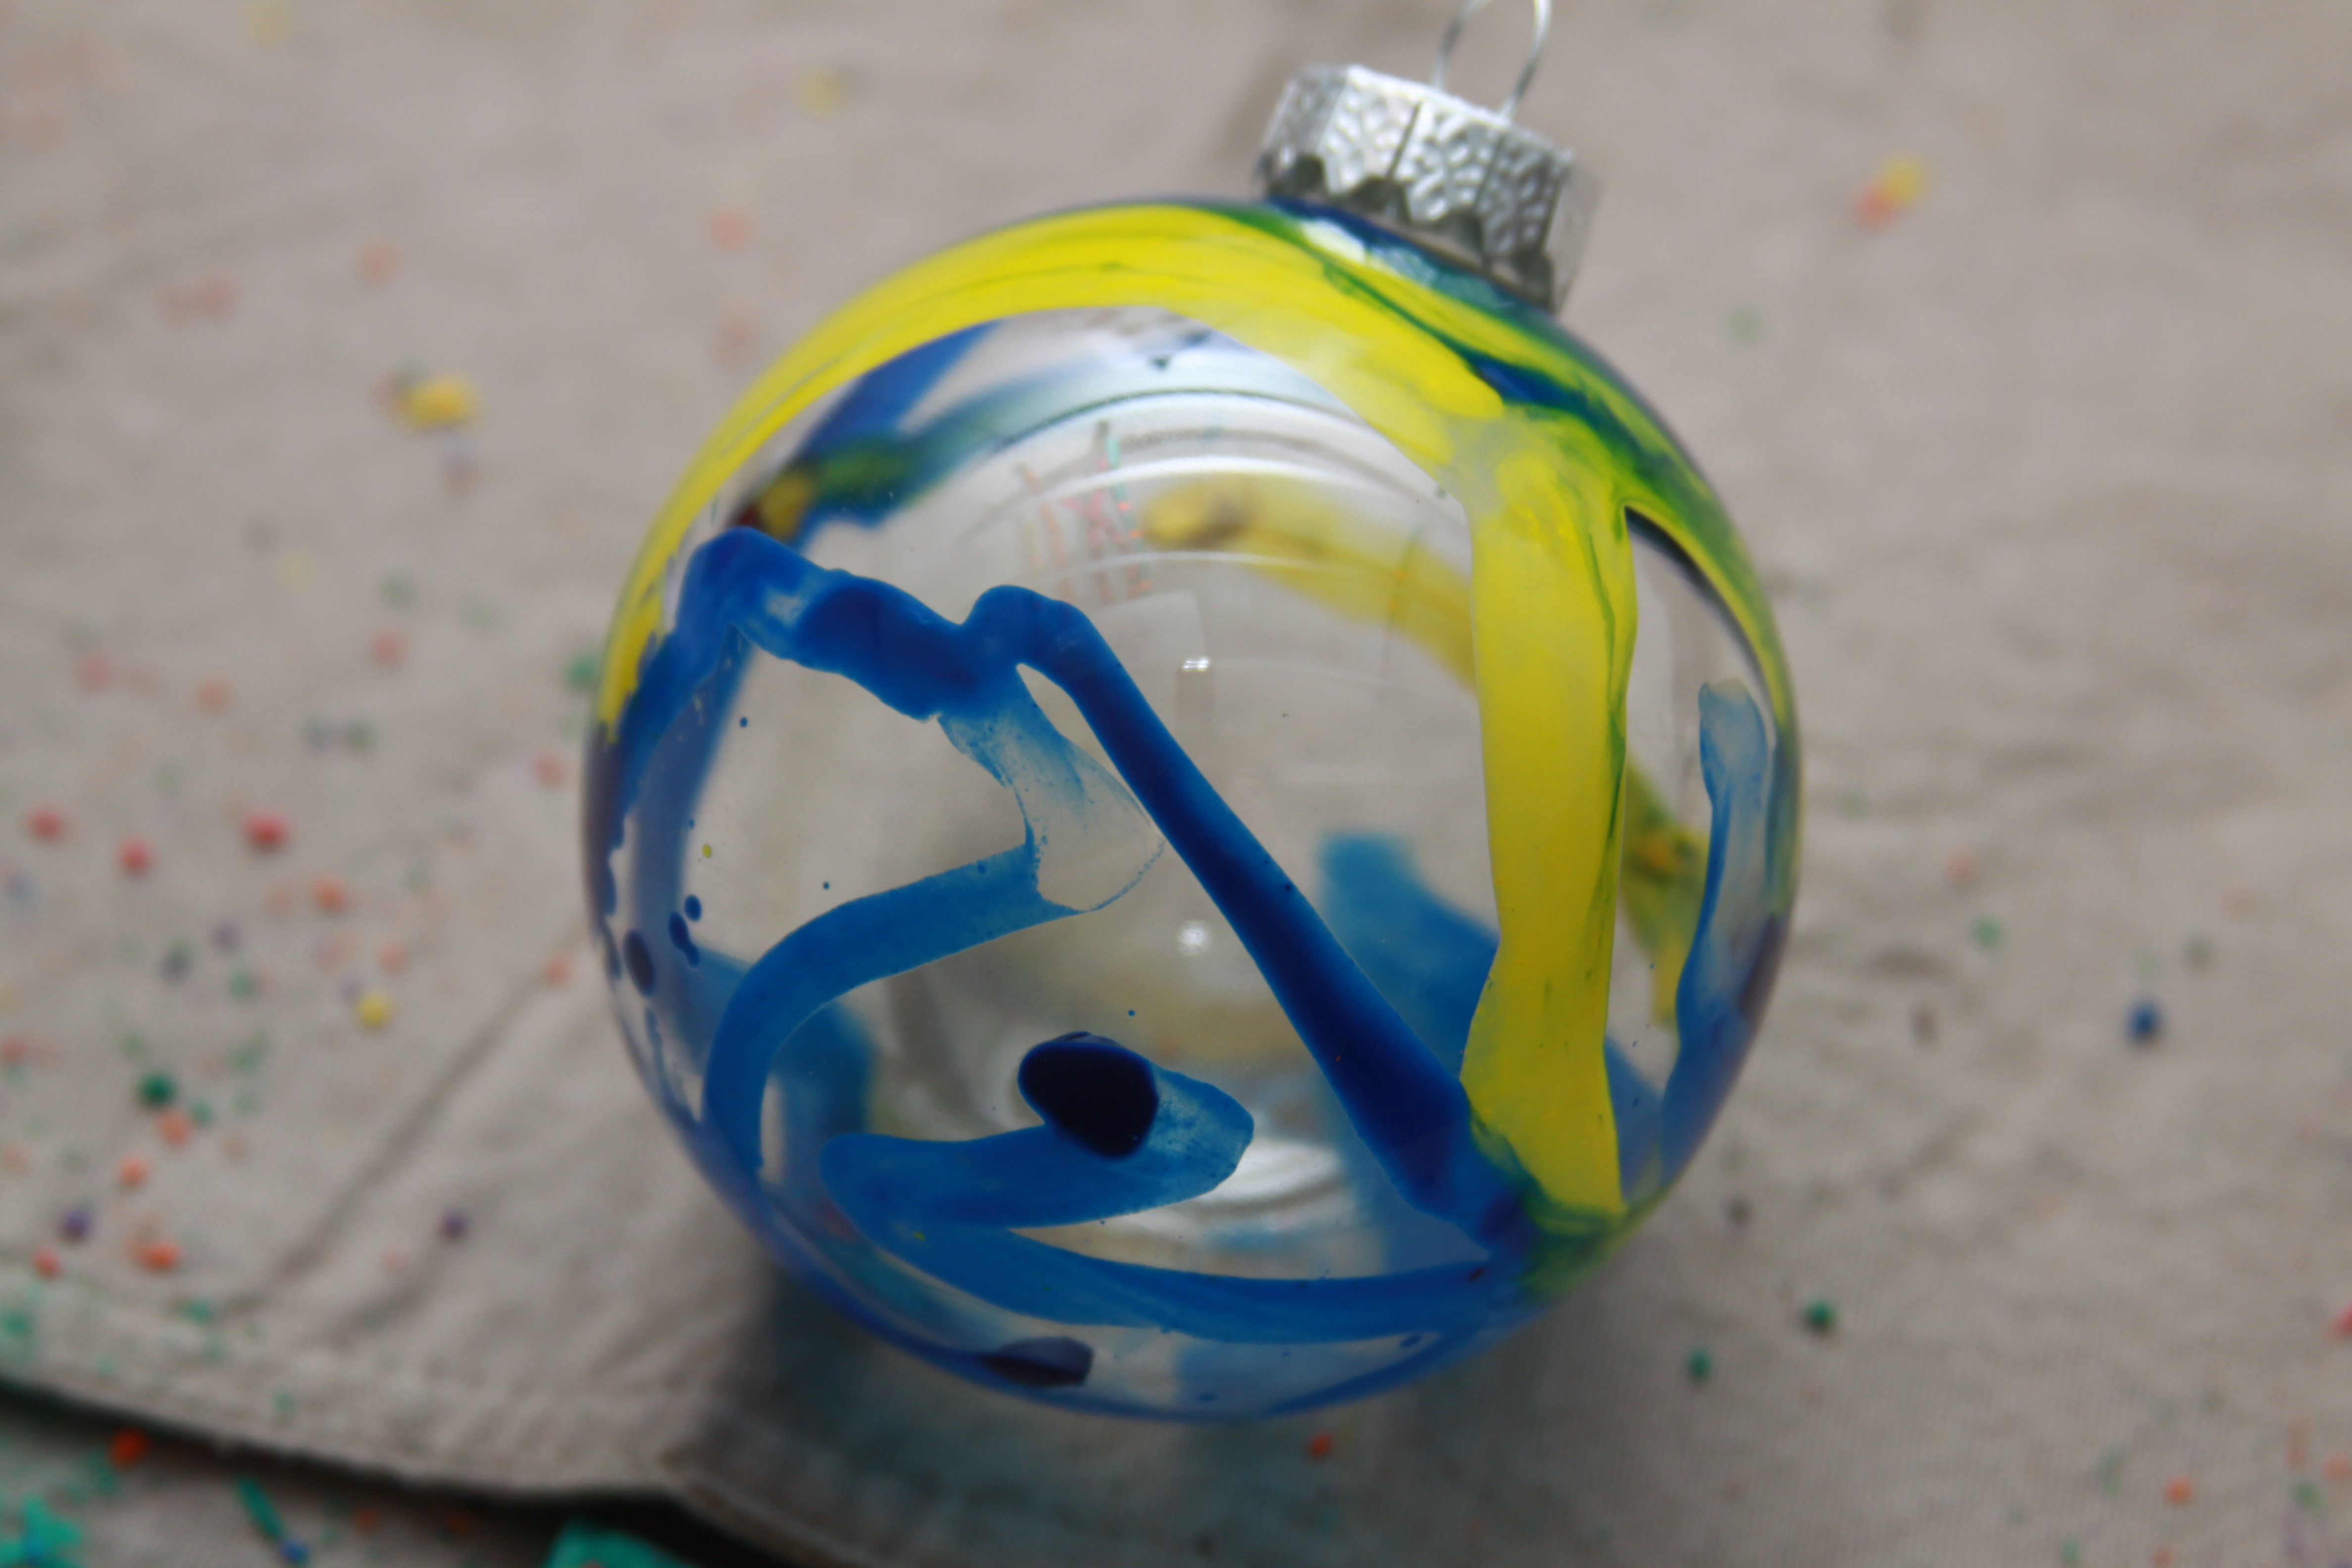
 Use the hair dryer to heat the ornament (and crayons) until the wax melts. With the shavings we shook to ornaments to spread the shavings around and the heated them just enough to get them to stick. The chunks take a little longer to melt, but as you turn the ornament, you have a little more control over where the color goes. I left lots of transparent space on mine because I liked the look of it, however, you can definitely cover the whole inside with color.
This was a great project to do with the superheros, however, because the glass gets super hot, I would definitely recommend some serious supervision. We let them choose their colors and fill the ornaments, but we held / turned the ornaments while the kids held the blow dryer. We tried oven mitts, but they made it hard to hold on to and as long as you keep it moving it shouldn’t burn your fingers.
Have fun!!!

This is great! I am putting your link on my blog for bulb ornaments being created for gifts this holiday season.
Thanks for sharing!
Pingback: Christmas Crafts Pt. 2 | craftyladyx3
really cool idea, thanks 🙂
Pingback: 20 Amazing Things to do with Crayons | How Does She
Pingback: Five Budget-Friendly Gifts to Make for the Holiday Season | The Art of Ed
Pingback: Painted Glass Ornaments for Christmas | A Life in Balance
I used a clothes pin for the kids to hold the ornament
Do you think if you used a clothespin to hold the ornament that would work?
Really like this idea!!, thanks.
Pingback: 10 DIY Christmas baubles to make with the kids | Mum's Grapevine
Pingback: 27 Spectacularly Easy DIY Ornaments for Your Christmas Tree DIYReady.com | Easy DIY Crafts, Fun Projects, & DIY Craft Ideas For Kids & Adults
Do you think that clear plastic bulbs would work just as well?
Would I be able to use the plastic bulbs for this?
Ok whats the trick? I love your yellow and blue ornament, tried to do one similar to it but mine turned into an ugly green mess. I did not use the round bulbs but the flattened glass bulb.
Thanks for your help.
Sharing your link to my blog, hoping to help some parents develop some really good we time during the holidays.
What size of Christmas bulbs are these?
Could you hold onto the ornament hanger with a pair of pliers to avoid burns?
I just tried this as a sample to do with the grans. I ended up with all the colors melted together in a ugly grey color. how did you keep the shavings separate?
Can you do this with plastic clear ornaments?
I would stay away from plastic only because of the heat, but I have honestly never tried it.
Something easy to do with the grandkids.
Pingback: 27 Spectacularly Easy DIY Ornaments for Your Christmas Tree DIY Projects Do It Yourself Projects and Crafts
Pingback: 21 Eco-Friendly Ways to Fill Clear Ornaments - Crafting a Green World
Pingback: 21 Eco-Friendly Ways to Fill Clear Ornaments | hometips.co.za
Pingback: 25 DIY Fabulous Ornaments You Need to Make This Christmas